Below follows help and examples of all different sequence diagram UML elements supported by the editor.
Click the copy icon below the sequence diagram images to copy the source text and paste it in the source editor.
View Menu
| Presentation Mode | - Hides menus, button, and text editor |
| Participant Overlay On Scroll | - Displays the participants in the top of the diagram as an overlay when they are scrolled out of view (enabled by default) |
| Read Only Presentation Mode | - When in presentation mode, disables editing the diagram using the mouse and instead allows to grab the diagram and move it around instead of scrolling |
| Shrink to Fit | - Scales the diagram to fit the page when it grows larger than the available space (works in presentation mode and edit mode) |
Buttons on all platforms
Export the diagram to images files, share link, or render it for copy / paste.
Adds a new participant into the
diagram of type participant.
Zoom in (also affects the export to image files).
Zoom out (also affects the export to image files)
Buttons on SequenceDiagram.org only
Start working on a new diagram (same as opening a
new tab in your browser, or changing the File Name in the save menu).
Open a source text file directly from your
hard drive, the browsers local storage, or cloud storage.
Save the source text.
Keyboard Shortcuts
| Ctrl-S / Cmd-S | - Save diagram source |
| Ctrl-O / Cmd-O | - Open diagram source |
| Ctrl-M / Cmd-M | - Presentation mode |
| Ctrl-Space / Cmd-Space | - Autocomplete in source |
| Ctrl-F / Cmd-F | - Find in source |
| Shift-Ctrl-F / Cmd-Option-F | - Replace in source |
| Shift-Ctrl-R / Shift-Cmd-Option-F | - Replace all in source |
Comments
- Text comments can be added in the diagram source on separate lines prefixed with either // or #
⎘
# This is a comment
// This is also a comment
Title
- The title is displayed at the top of the diagram
- Edit the title by double-clicking it
- Delete the title by clicking it and pressing the delete key
- Note: The title can also be used as the file name on the sequencediagram.org platform (enabled in settings) when the
icons are clicked

⎘
title Title
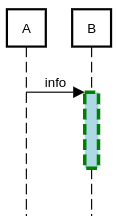
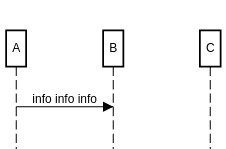
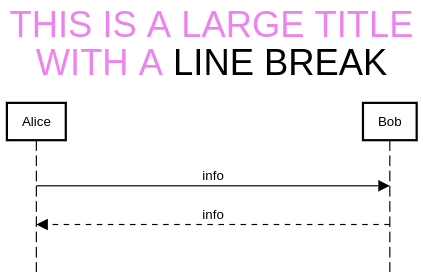
A->B:info
⎘
title <size:30><color:#violet>THIS IS A LARGE TITLE\nWITH A </color>LINE BREAK</size>
participantspacing 14
Alice->Bob:info
Alice<--Bob:info
Participants
- New participants of type participant may be added by clicking the
icon
- The following special participant types exist
- participant - box with participant name inside (the default)
- rparticipant - rounded box
- actor - specific icon
- boundary - specific icon
- control - specific icon
- database - specific icon
- entity - specific icon
- materialdesignicons - unicode code points (see right hand side in the gray bar after clicking an icon)
- fontawesome6solid - unicode code points (see top right corner after clicking an icon)
- fontawesome6regular - unicode code points (see top right corner after clicking an icon)
- fontawesome6brands - unicode code points (see top right corner after clicking an icon)
- image - png image data url, maximum data url size is 50KB, the rendered size is calculated based on maximum participant height, add padding in the top of the image to decrease rendered width and total size
- Note: fontawesome5solid/regular/brands and fontawesome (v4) are now deprecated but will remain supported until at least 2025
- A displayed name can be used to style the participant name or add line breaks:
- actor "<color:#green>My long display\nname with color</color>" as Alice
- Edit a participant by double-clicking it
- Change the position of participant by clicking and dragging it to the right or left passed another participant
- Delete a participant (and all messages interactions with it) by clicking it and using the delete key

⎘
participant Participant

⎘
rparticipant Rounded

⎘
actor Actor

⎘
boundary Boundary

⎘
control Control

⎘
database Database

⎘
entity Entity

⎘
actor "**++Big and\nbold name" as actorMultiline #red
⎘
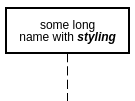
participant "some long\nname with **//styling//**" as participantMultiline
⎘
materialdesignicons F1FF escalator
⎘
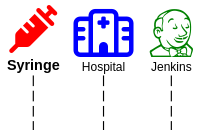
fontawesome6solid f48e "++**Syringe**++" as Syringe #red
fontawesome6regular f0f8 Hospital #blue
fontawesome6brands f3b6 Jenkins #green
⎘
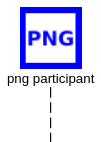
image data:image/png;base64,iVB... png participant

⎘
database Database #lightblue #green;3;dashed
actor Actor #yellow #orange;4
boundary Boundary #salmon #red
control Control #lightgreen
entity Entity ;3;dashed
participant Participant #pink ;0
participant "++**Participant 2**++" as Participant2 ;0
Bottom Participants
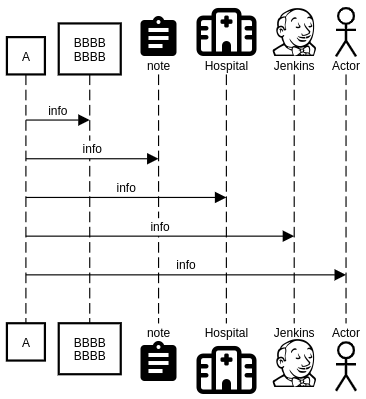
- The participants can be displayed in the bottom of the diagram by using the bottomparticipants keyword which renders all the participants in the bottom of the diagram
- Note: An alternative for displaying participants when scrolling in a large diagram is "View" -> "Participant Overlay On Scroll"
⎘
bottomparticipants
participant A
participant "BBBB\nBBBB" as B
materialdesignicons f14d note
fontawesome6regular f0f8 Hospital
fontawesome6brands f3b6 Jenkins
actor Actor
A->B:info
A->note:info
A->Hospital:info
A->Jenkins:info
A->Actor:info
Messages
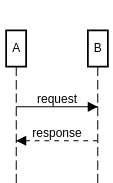
- Messages are created by clicking and dragging in the diagram
- Hold Shift before clicking for dashed line
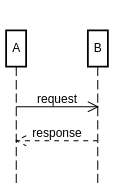
- Hold Ctrl (or Cmd for Mac) before clicking for open arrow
- Hold Shift+Ctrl (or Shift+Cmd for Mac) before clicking for open arrow with dashed line
- Edit the text of a message by double-clicking it
- Change the start and end participants of the message by clicking and dragging the start or end of the message
- Change position of the message by clicking and dragging the middle of the message
- Delete the message by clicking it and pressing the delete key
- New line is create using \n
⎘
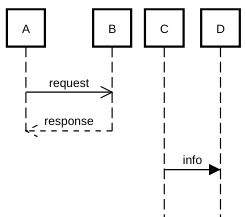
A->B:request
A<--B:response
⎘
A->>B:request
A<<--B:response
⎘
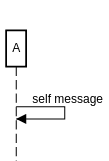
A->A:self message

⎘
Alice-[;4]>Bob:Test12345
Alice-[;2]>>Bob:Test
Alice-[#00ff00;2]>Bob:Test
Alice-[#red;4]->Bob:Test
Alice<<-[#red;3]-Bob:Test
Alicex[#red;3]-Bob:Test
Alice-[;4]>(5)Bob:Test
Bob-[;4]>Bob:Test
Alice<-[;3]>Bob:Test
Alice<-[#00ff00;2]>Bob:Test
Alice<-[#red;3]>Bob:Test
Non-instantaneous Messages
- Non-instantaneous messages are created by adding ([delay]) before the target participant, examples:
- A->(1)B: info
- A-->(5)B: info
- A->>(2)B: info
- Otherwise non-instantaneous messages behaves just like normal messages
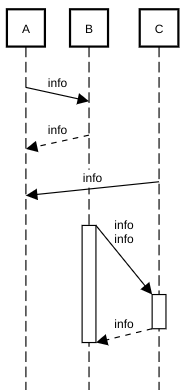
⎘
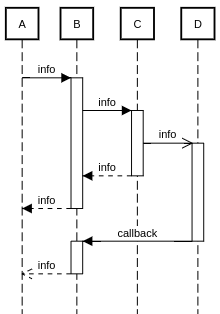
participant A
participant B
participant C
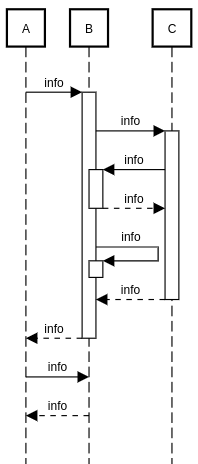
A->(1)B:info
A(1)<--B:info
A(1)<-C:info
B->(5)C:info\ninfo
activate B
activate C
B(1)<--C:info
deactivate C
deactivate B
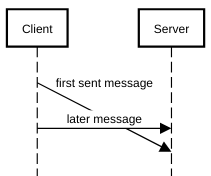
⎘
Client->(5)Server:first sent message
space -6
Client->Server:later message
Incoming and Outgoing Messages
- Incoming and Outgoing Messages are created by using the special participants [ and ], examples:
- [->A: info
- A->]: info
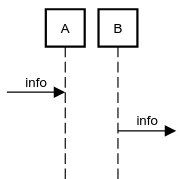
⎘
[->A:info
B->]:info
Failure Messages
- Failure Messages are created by using x to denot the arrow head, examples:
- A-xB: info
- A--#redx(1)C: info
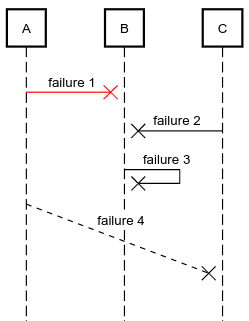
⎘
A-#redxB:failure 1
C-xB:failure 2
Bx-B:failure 3
C(5)x--A:failure 4
Notes and Boxes
- Notes and boxes are created by right clicking in the diagram and selecting the wanted note / box entry from the menu
- Edit the text of a note or box by double clicking it
- Change the start and end participants of the "note or box over several participants" by clicking and dragging the start or end of the note or box
- Change position of the note or box by clicking and dragging the middle of the note or box
- Note: It is the bottom of the shapes that counts as the y position when dragging
- Delete the note or box by clicking it and pressing the delete key
- New line is create using \n
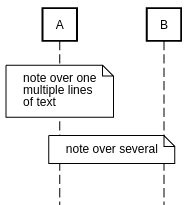
⎘
note over A:note over one\nmultiple lines\nof text
note over A,B:note over several
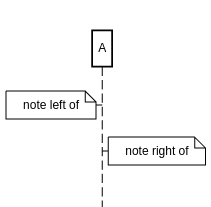
⎘
note left of A:note left of
note right of A:note right of
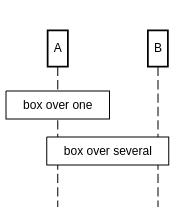
⎘
box over A:box over one
box over A,B:box over several
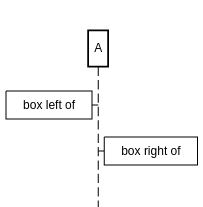
⎘
box left of A:box left of
box right of A:box right of
⎘
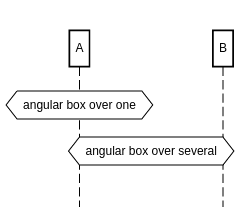
abox over A:abox over one
abox over A,B:abox over several
⎘
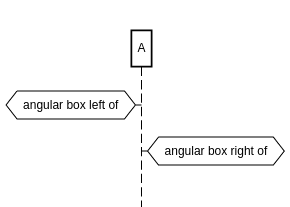
abox left of A:abox left of
abox right of A:abox right of
⎘
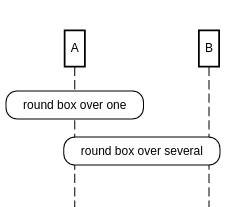
rbox over A:rbox over one
rbox over A,B:rbox over several
⎘
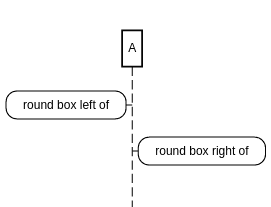
rbox left of A:rbox left of
rbox right of A:rbox right of
⎘
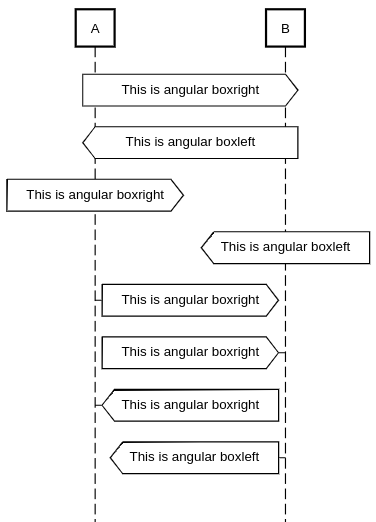
aboxright over A,B:This is angular boxright
aboxleft over A,B:This is angular boxleft
aboxright over A:This is angular boxright
aboxleft over B:This is angular boxleft
aboxright right of A:This is angular boxright
aboxright left of B:This is angular boxright
aboxleft right of A:This is angular boxright
aboxleft left of B:This is angular boxleft

⎘
note over A #lightblue #green;3;dashed:info
note over A #yellow #orange;4:info
note over A #salmon #red:info
note over A #lightgreen:info
note over A ;3;dashed:info
note over A #pink ;0:info
note over A ;0:info
